Reset Switch
A simple reset switch is the simplest hardware mod available for the Wii mini. It is however, one of the most important ones, as it will allow you to navigate menus not supporting Wii remotes, such as bootmii IOS as well as enter priiloader without the need for a USB keyboard.
Parts Required
- Two (2) pieces of wire of any kind, preferably wrapping wire around 28-32AWG for easier routing and tucking. Having different colours is recomended for easier troubleshooting.
- One (1) Normally Open (NO) pushbutton of any kind. It can be big or small, clicky or silent, as long as it’s a NO button it works.
- Optionally, you may use some connector (such as a 2-pin JST or DuPont) for easily detaching and reattaching the button, since it may be hard to open the case with it mounted, depending on where you place it.
Installation
-
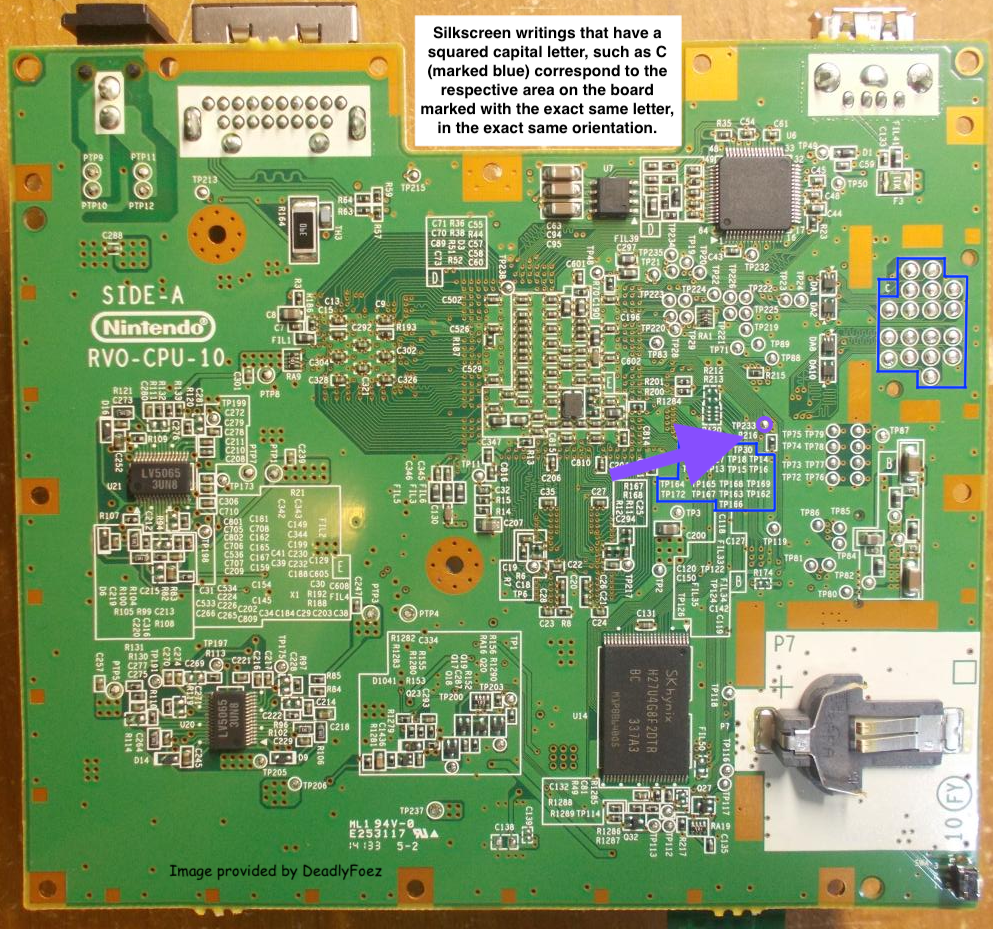
Flip your console around and locate the test pad labeled
TP233on your board, marked with purple below:
-
Solder one of your two wires on that pad and to one side of your switch
-
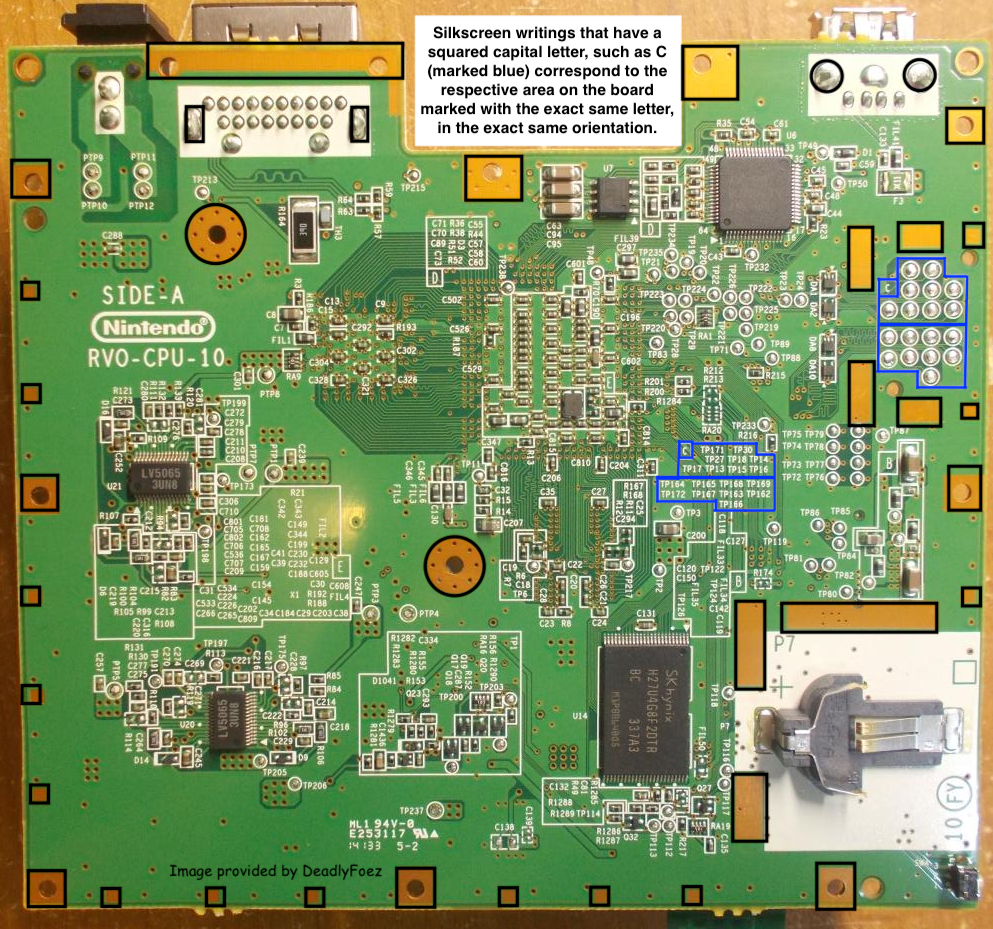
Solder the other wire to the opposite side of your switch (if it’s a 4-pin smd or tht button the pin diagonal to the one you soldered to before will always be on the opposite side of the open circuit) and connect it to any ground pad on the board, marked black below:

Please check wether the pad you’re soldering to interferes with the metal shield or any screws before soldering. It’s okay to bend a shield flap a little if you want it to fit, as long as it doesn’t interfere with the console’s plastic casing.
-
Find a place to mount your button on your case. A good position is usually either the rear of the console or the little insets on the inside of the disc drive tray, where your fingers normally go for lifting the disc. This greatly depends on the size and type of your button.
Before you mount your button, make sure that it actually does fit inside the case completely and there’s space for the wires to be routed to the board, even with the metal shield, plastic shroud and dvd drive in place.
Post-Install
You can now test whether the button works simply by powering up your console and pressing the button once inside the System Menu or any other game. The current application should reload.
If your console appears to be stuck in a bootloop or is otherwise resetting constantly, check that the button is not shorting against anything and that it is in fact normally open. If you have a multimeter, you can do that by setting it to continuity mode and measuring between the two wires. You should have no continuity (OL or 1 on the meter’s screen) when the button is not pressed and a direct short (close to 0, with a beep if the meter has a buzzer) when pressing the button.
We’d love to see your completed mod, feel free to join us on our Discord and post a picture in #pimping-general
Return to Pick-a-Pimp | Continue to site navigation
We have other tutorials that you might like.